Update 10/1/2025: We’ve recently developed a number of sample projects to help you get started with ScyllaDB. For repos and tutorials, go to our Developers site.
In Part 1, we saw how to create a ScyllaDB cluster in the cloud and connect to the database using CQLSH and ScyllaDB Drivers. In this article, we will explore how to create, read, update and delete data using NodeJS and ScyllaDB Cloud.
You can also find the video series associated with this article on youtube.
Create
Let’s now implement our callback function in the post middleware. Replace the router.post middleware with the following code:
router.post('/', async (req, res, next) => {
   try {
      const { name } = req.body;
      const itemId = cassandra.types.Uuid.random();
      const query = 'INSERT INTO items(id, name, completed) VALUES (?, ?, ?)';
      await cluster.execute(query, [itemId, name, false]);
      res.status(200).send({ itemId });
   } catch (err) {
      next(err);
   }
});
Let’s go over the above code. First, we are deconstructing the name object from the request’s body. We generate a random itemID that we can return after running the INSERT query.
Third, we create a query object that represents the CQL query that is going to be executed in our database. We have replaced the values with question marks “?” that is going to be passed as an array to the execute function.
Finally, we will return the itemId.
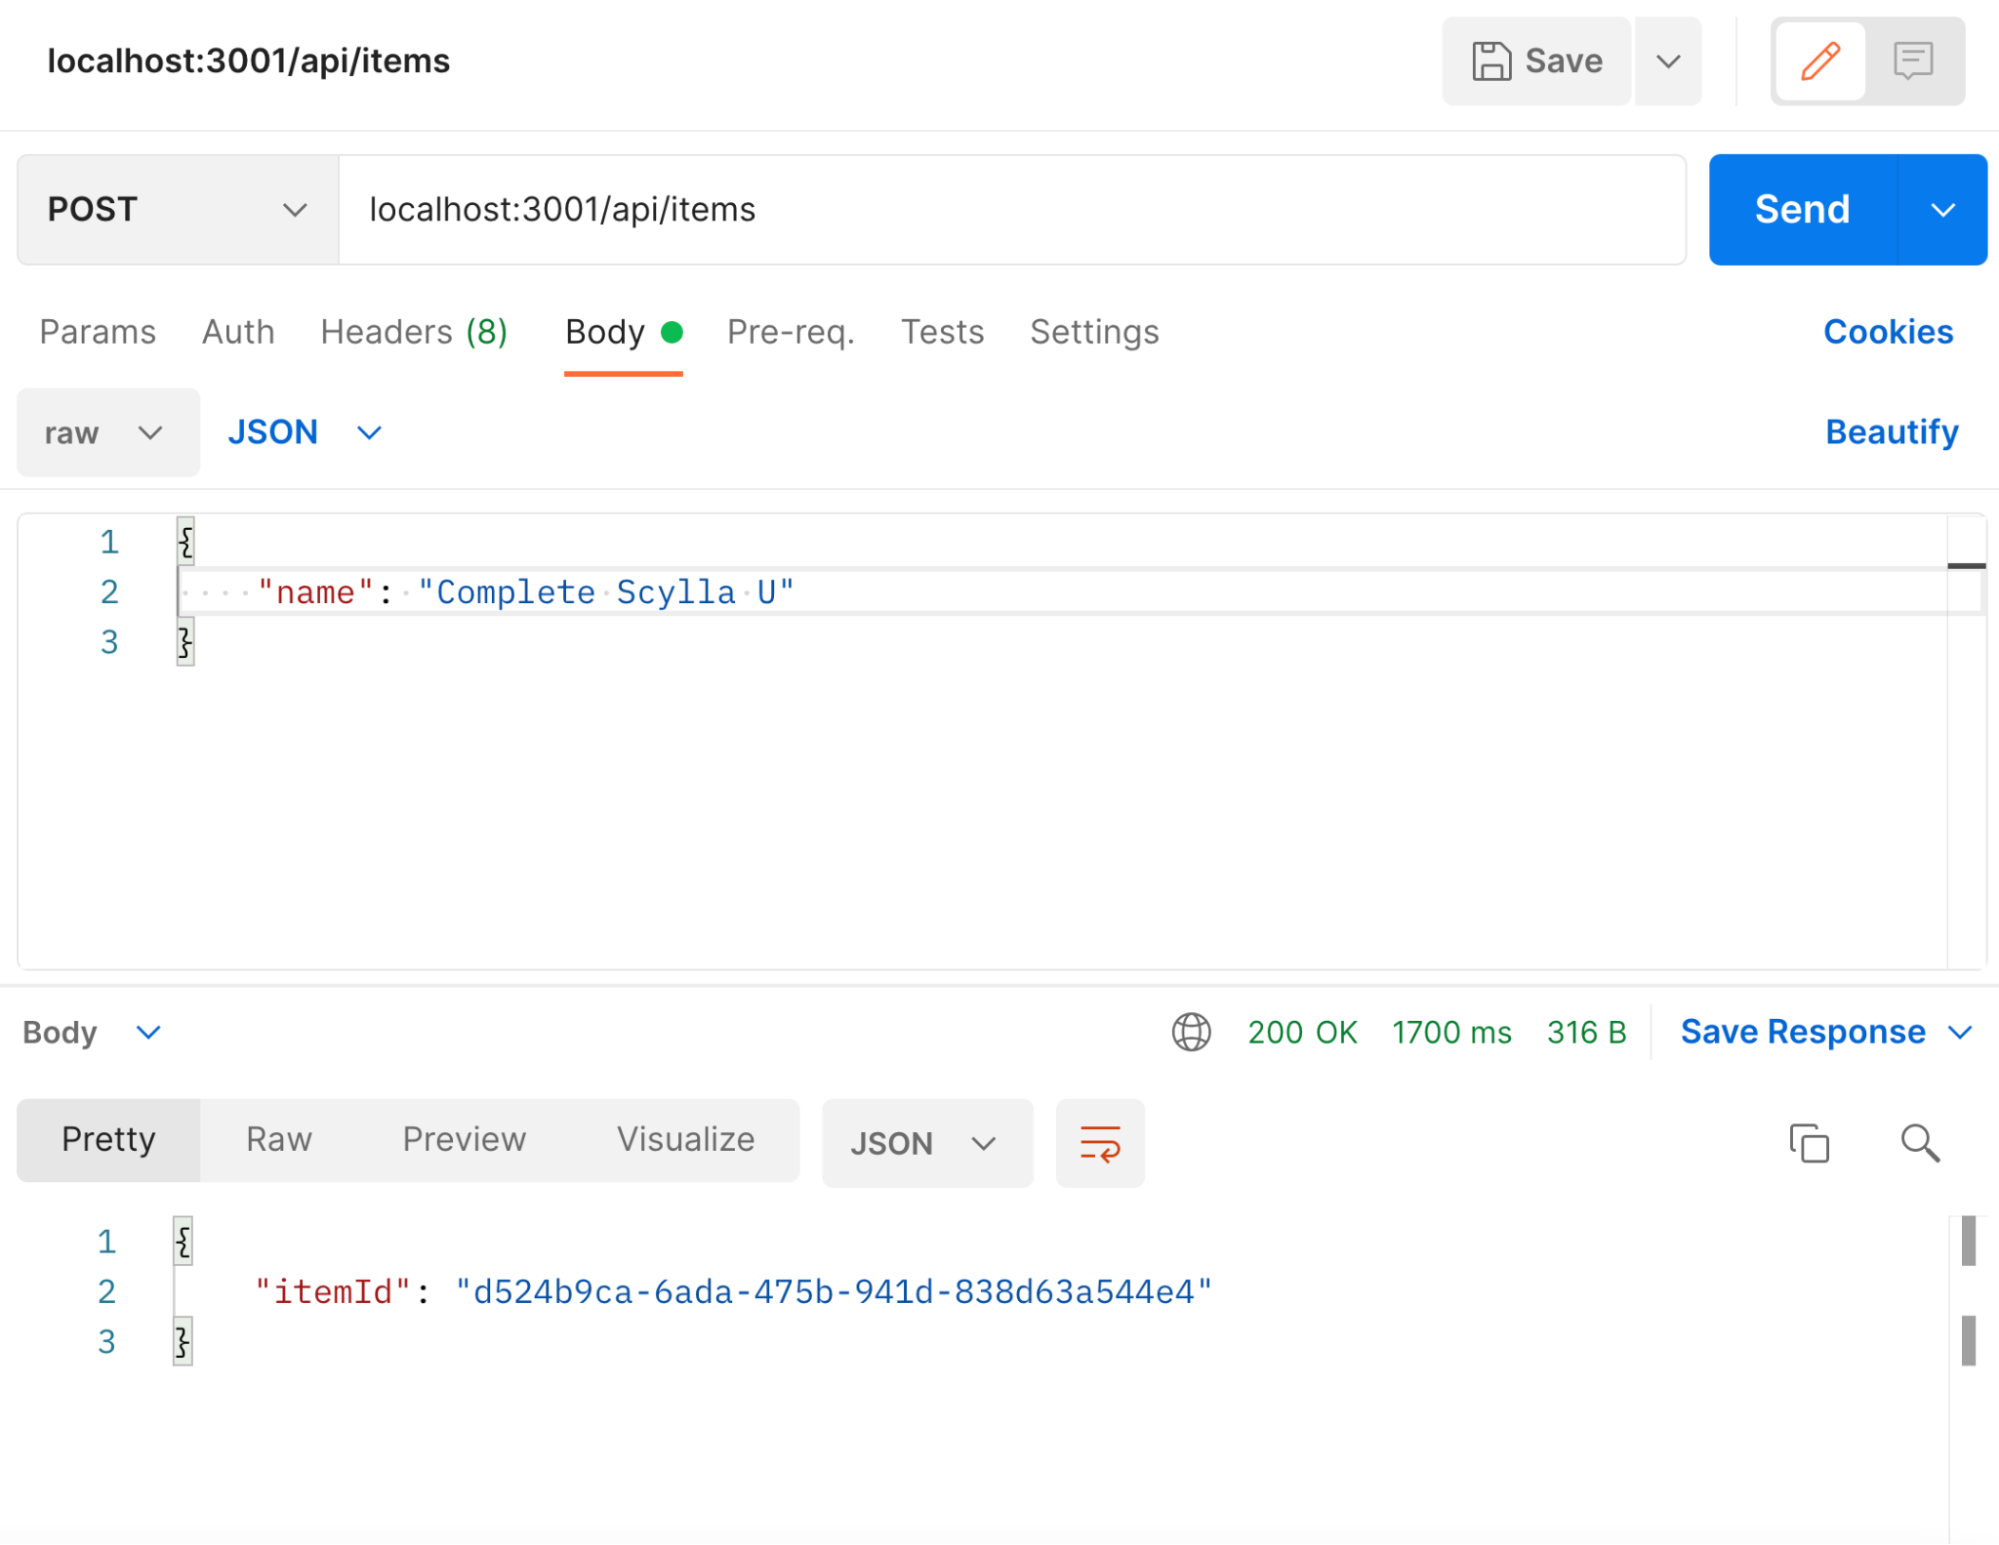
Let’s test our code using Postman. We will send a POST request to http://localhost:3001/api/items endpoint. In the body tab, select raw and JSON and add the object name with the name of the task.
You should receive status 200 and a random itemId as illustrated below.
Let’s now implement the code to create items from our front-end.
The client directory, we will first install a package named axios that will allow us send HTTP requests to our server.
npm i axiosIn the components/TodoList.js file, import axios then locate the onCreateItem function and add the following code inside the useCallback hook:
import axios from 'axios';
const BASE_URL = 'http://localhost:3001/api';
const TodoList = () => {
const [items, setItems] = useState([]);
const onItemCreate = useCallback(
async (newItem) => {
const res = await axios.post(BASE_URL, newItem);
setItems([...items, { ...newItem, id: res.itemId }]);
});
},
[items]
);
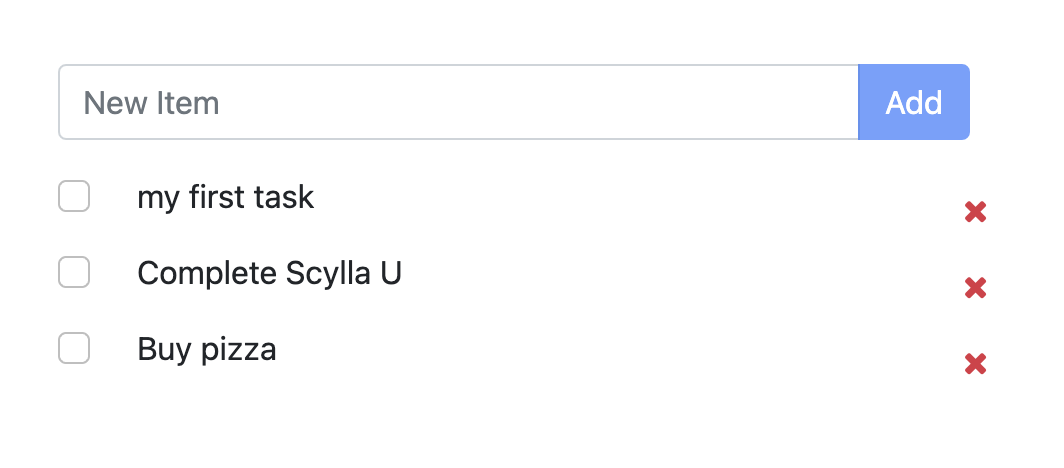
//...On your browser, add a new item and click on send.
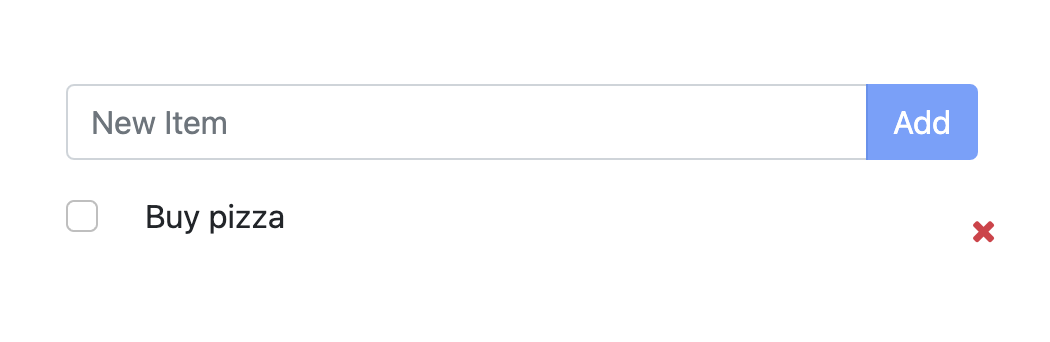
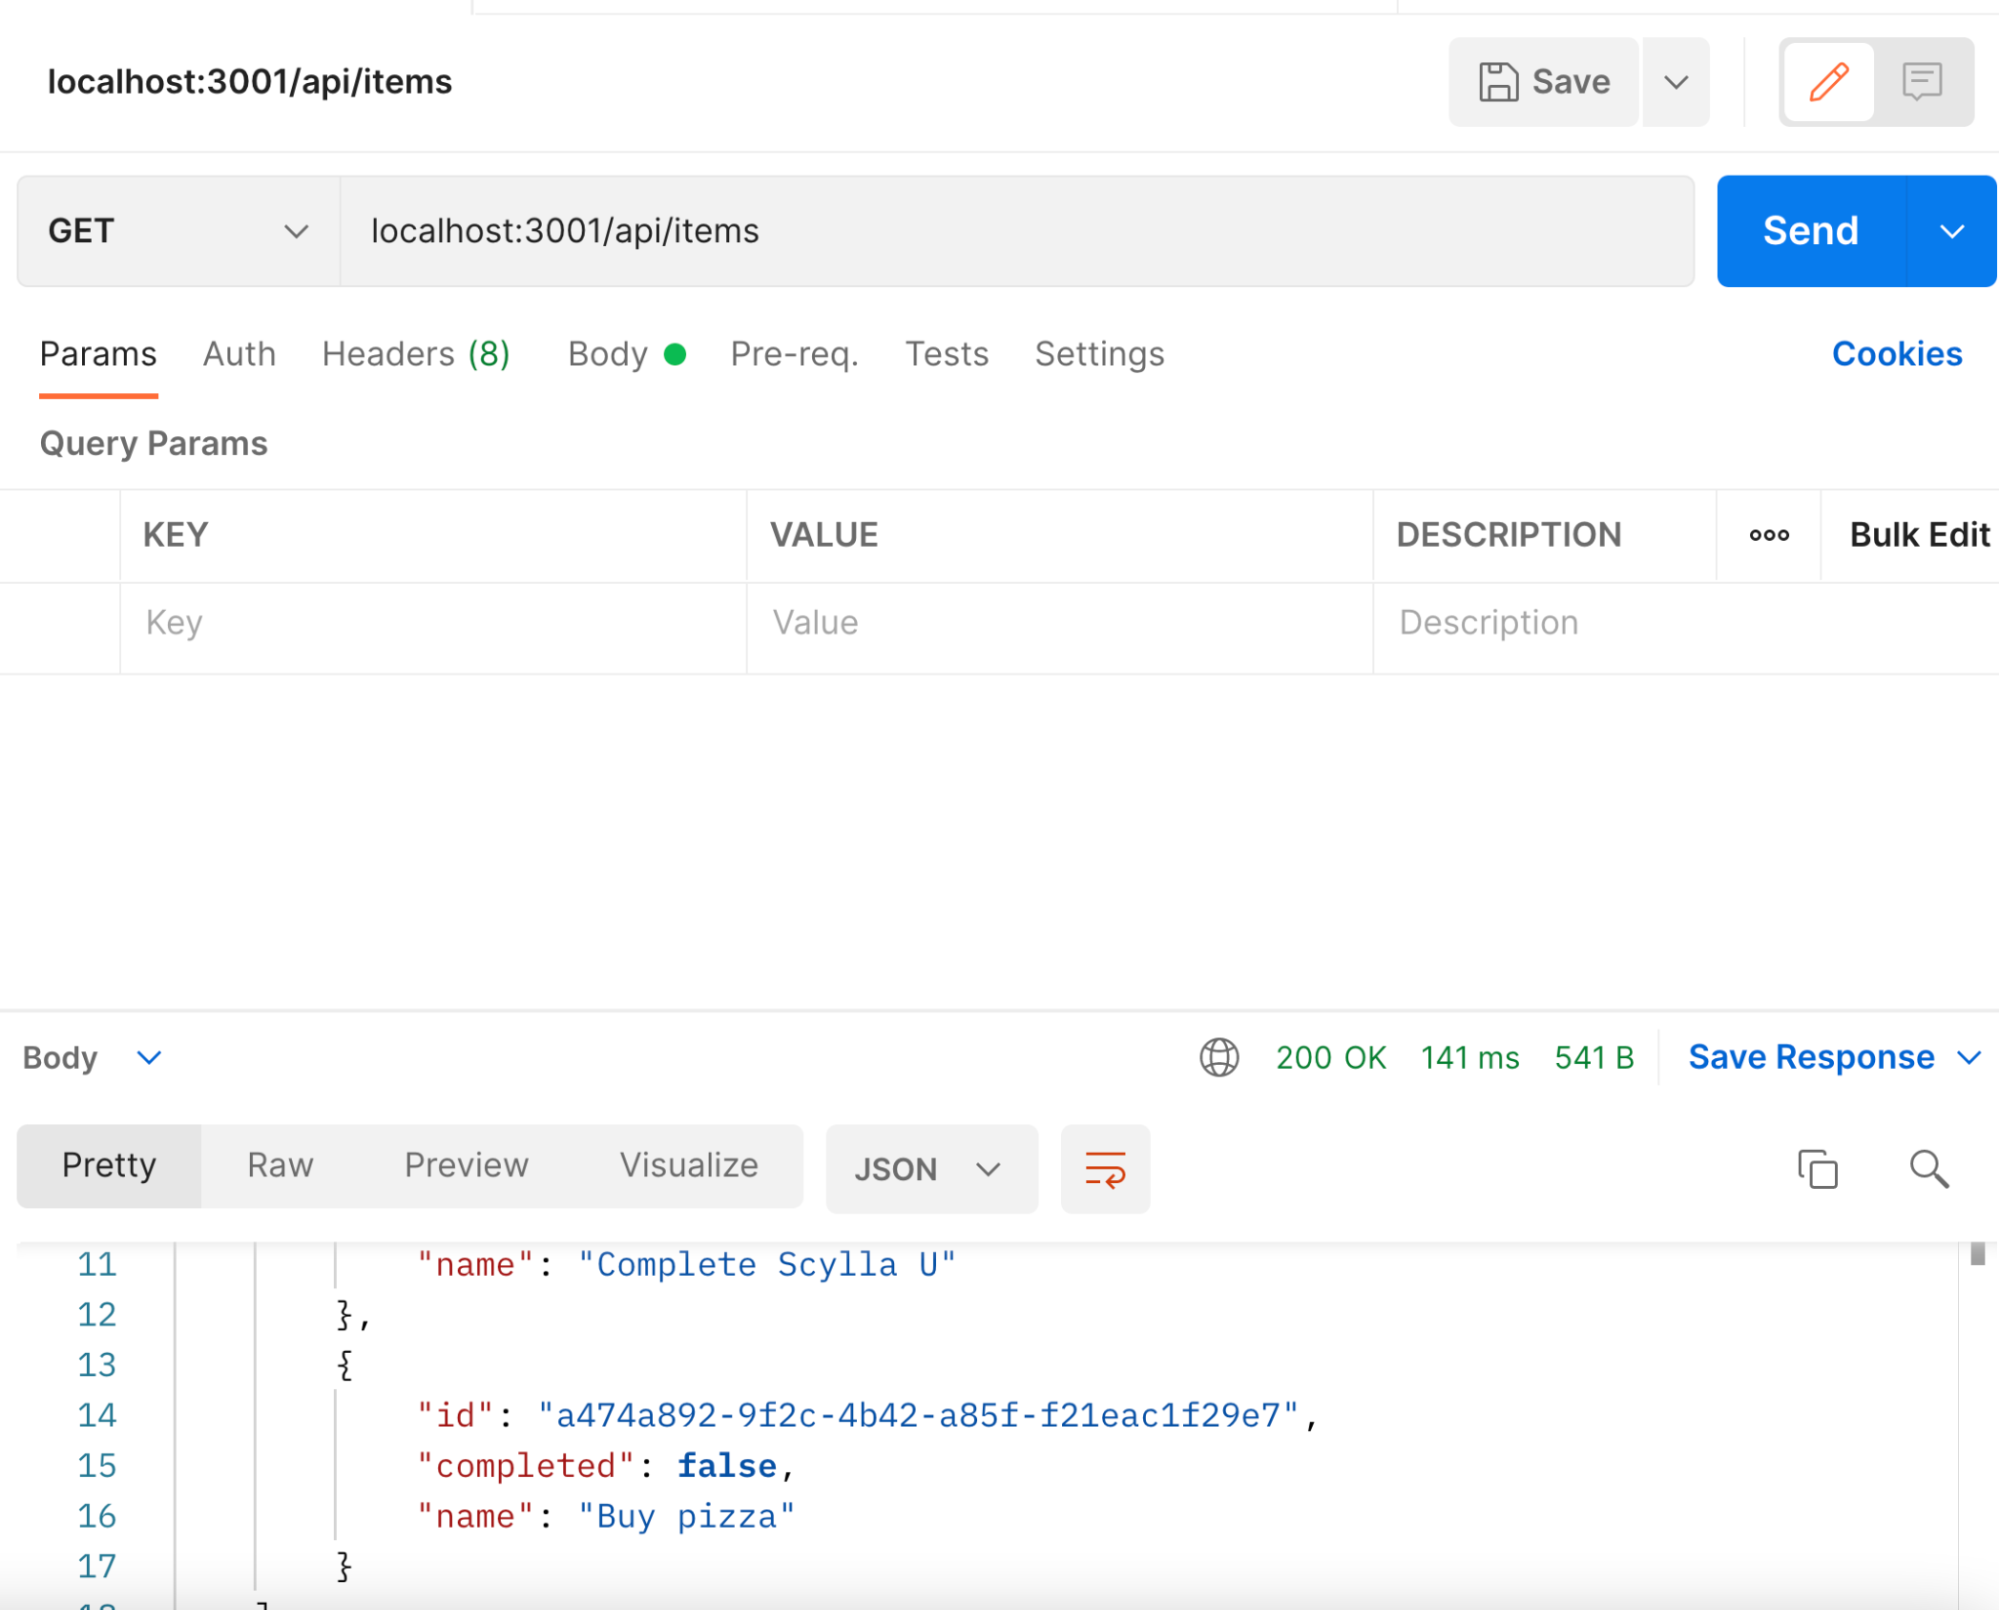
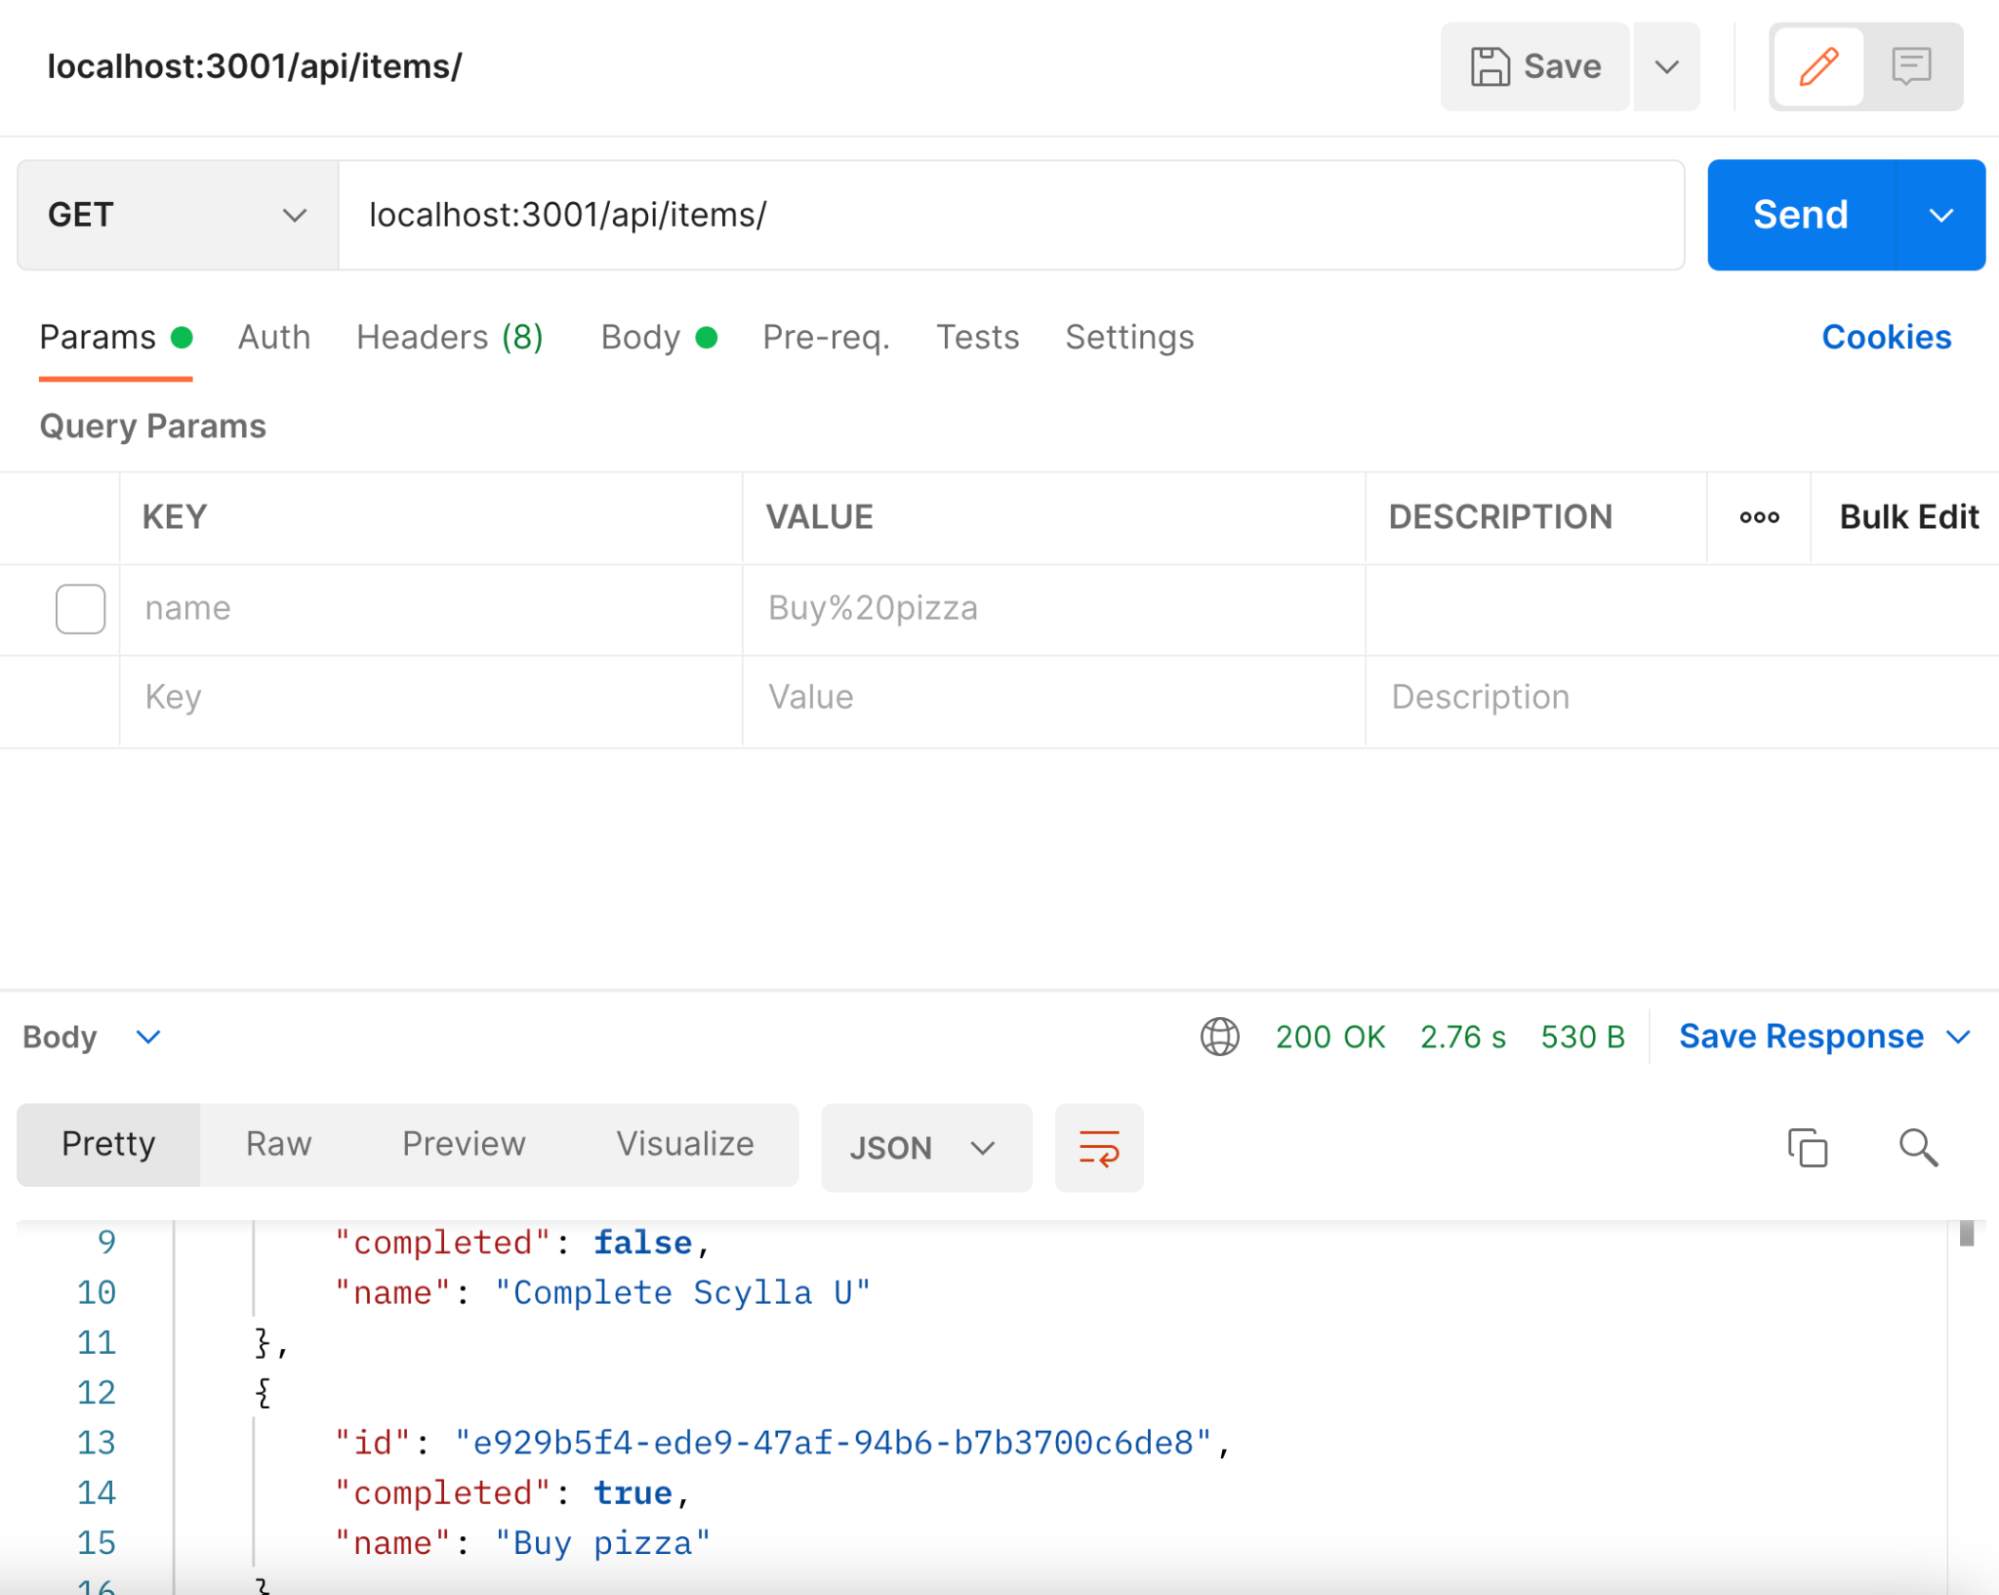
On Postman, send a GET request to http://localhost:3001/api/items to see the list of all items. You should expect all the items you created.
Read
Now that we have successfully created an item and saved it to our database, let’s create the GET middleware that will allow us to read from our database and display all the items in the browser.
In items.js file, locate the router.get middleware and replace it with the following code:
// Get all items
router.get('/', async (_, res, next) => {
   try {
      const query = 'SELECT * FROM items';
      const result = await cluster.execute(query);
      res.json(result.rows);
   } catch (err) {
      next(err);
   }
});
In the code above, we have created a query constant to select all items from the items table. We then execute the query and save the result. Finally, we will send the items using result.rows.
Let’s now display all the items in the browser. In the TodoList.js component, add the following code:
import React, { useState, useCallback, useEffect } from 'react';
// ...
const TodoList = () => {
// ...
useEffect(() => {
const getItems = async () => {
const res = await axios.get(BASE_URL);
setItems(res.data);
};
// TODO: Uncomment the below after you implement the server
getItems();
}, []);
// ...
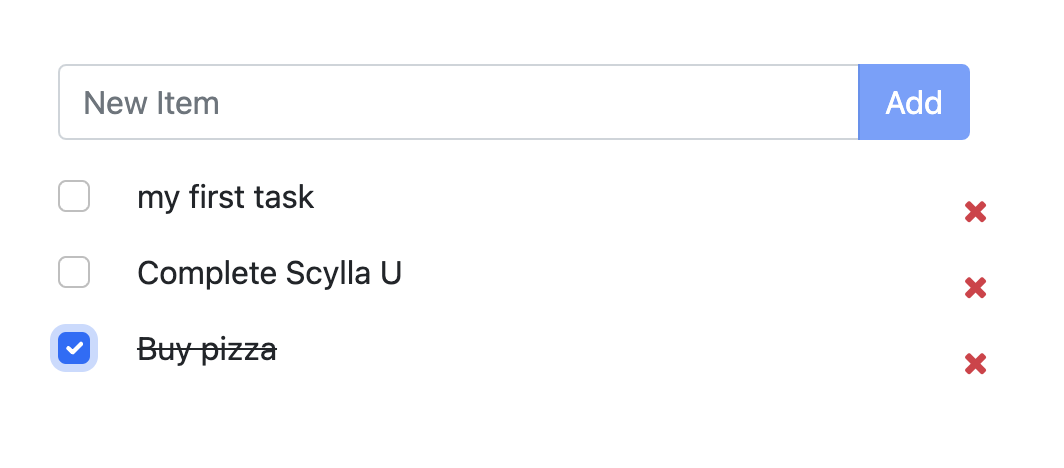
};Save the file. You should expect all your items to be displayed in the browser.
So far, we implemented the post and get middleware to create a new item and read from the database. Next, we will implement the update and delete middlewares to complete the CRUD operations.
Update
Great! So far we have created items and read them from the database. We now will re-write the router.put middleware to update items.
In server project, locate the items.js file and update the put middleware with the following:
// Update item
router.put('/:id', async (req, res, next) => {
   try {
      const { id } = req.params;
      const { completed } = req.body;
      const query = 'UPDATE items SET completed=? WHERE id=?';
      await cluster.execute(query, [completed, id]);
      res.status(200).send();
   } catch (err) {
      next(err);
   }
});
Let’s explain the above code. We are sending the itemId as a parameter in the URL. We are likewise sending the completed field in the body. Since we only need to update the completed field, we do not send the entire item object.
Just like before in Create and Read, we create a query constant that uses a CQL statement to update the items table. The question marks “?” in the CQL statement represent the parameters that are passed as an array in the execute function. Finally, we will send status 200 after the query is successfully executed.
In the client application, in The TodoList.js component, locate the onItemUpdate function and replace it with the following code:
const onItemUpdate = useCallback(
   (item) => {
      async (item) => {
         await axios.put(`${BASE_URL}/${item.id}`, { completed: item.completed });
      const index = items.findIndex((i) => i.id === item.id);
      setItems([...items.slice(0, index), item, ...items.slice(index + 1)]);
   },
   [items]
);
We’re using axios to send a PUT request with the item ID as parameter and the completed object in the request body.
We can test the above with Postman to send a GET request to the API.
Delete
Finally, we can implement the delete middleware in our backend, then handle the request in the frontend.
<// Delete item
router.delete('/:id', async (req, res, next) => {
   try {
      const { id } = req.params;
      const query = 'DELETE FROM items WHERE id=?';
      await cluster.execute(query, [id]);
      res.status(200).send();
   } catch (err) {
      next(err);
   }
});
Just like in the update callback function, we use the item ID as a parameter and a WHERE clause in the CQL query to locate the item we want to delete.
In the TodoList component in the client project, locate the onItemDelete function and replace it with the following:
const onItemDelete = useCallback(
    async (item) => {
        await axios.delete(`${BASE_URL}/${item.id}`)
            const index = items.findIndex((i) => i.id === item.id);
            setItems([...items.slice(0, index), ...items.slice(index + 1)]);
        });
    },
    [items]
);
We use axios.delete to send DELETE request to the API. We pass the item.id as a param in the URL. Once the request is successful, we update the frontend a remove the item from the items state.
Congratulations! If you followed along, we came a long way! In this series, we create a Todo application to Create, Read, Update and Delete items stored in ScyllaDB Cloud, using NodeJS, express and the cassandra-driver.
I hope you enjoyed the articles and found them useful to quickly get started with ScyllaDB Cloud. Please feel free to share your feedback with us and let us know what you want to see in the future.